


Disclosure :: this post contains affiliate links.
We Made A DIY Cold Plunge! :: Here’s How
It’s no secret that I am into all things bio-hack related. I LOVE, and I mean geek-out level love, learning how to help my body function as optimally as possible. I read research on the matter, listen to several podcasts, and am pretty much down to try most things (proven to be beneficial) at least once. I’m such a nerd about this stuff that I have willingly put myself into 45-degree water for 3-5 minutes on more than one occasion. Which is hilarious because I HATE THE COLD. Truth be told, I prefer a scalding hot bath to any form of cold. In fact, I wrote a post on the benefits of the Infrared Sauna not long ago but like I said, I am a sucker for the research. So today is all about the cold plunge!
The first time someone ever suggested the cold plunge to me I said “There is no way! I hate the cold.” But then said friend began sending me research articles on the cold plunge, and podcast episodes from some of the top researchers in the field. And I slowly began to become a believer. Well, maybe not a believer, but someone who was willing to give it a try. Right around this time, we were on a family trip to Yellowstone, and we found a local hot springs pool. This pool was AMAZING and had pools of varying temperatures, one of which was a crisp 55 degrees. Now was my chance. Here I was in the middle of the mountains of Wyoming, with a beautiful sunset behind me. Best of all, there was also an actual hot spring adjacent to the cold one, in case I regretted my decision.

Taking The Plunge
Not wanting to look like a wimp in front of my husband and kids (who said there was no way I could make it 3 minutes), I sank into the cold pool without hesitation. HOLY MOLY was it cold! The first minute was the worst. I honestly thought I wouldn’t make the full 3 minutes. But after the initial shock wore off, it became more tolerable. (Research suggests this is because you form a thermal layer after the first minute of submersion). Whatever the reason, it was becoming more tolerable, and I was submerged up to my collarbone at this point. With teeth chattering and goose bumps on every part of my body, I made the full 3 minutes. And let me tell you … I felt ALIVE!
It was the most interesting feeling, like every cell in my body was awake. Like my body was humming with energy, but simultaneously calm. I had also been struggling with a headache for most of the day, which was now completely gone. I ended up alternating hot and cold submersion for the next hour, and when I left I felt better than I had in a very long time. After that, I was a believer. But how was I going to have access to that once I was home? Realistically, a membership at one of those places with saunas and cold plunges is not an option for me. From a time standpoint, I don’t have any. And I didn’t want to pay for something that I knew I would likely not be able to capitalize on regularly.
So I bought ice to fill my tub intermittently, mostly on days where I was sore from a hard workout. That quickly became annoying, and not cost-effective. So, I upgraded to a small ice pod. While this was a step up from the bathtub, it still didn’t keep the ice cold for long, which was still not cost-effective and it was annoying. Then a friend of mine (the same one who first told me about the cold plunge) made his own. It was pretty brilliant actually. He took a deep freezer, plugged it into a Christmas light timer, and voila! He now had a fully functional cold plunge that stayed cold but never froze. 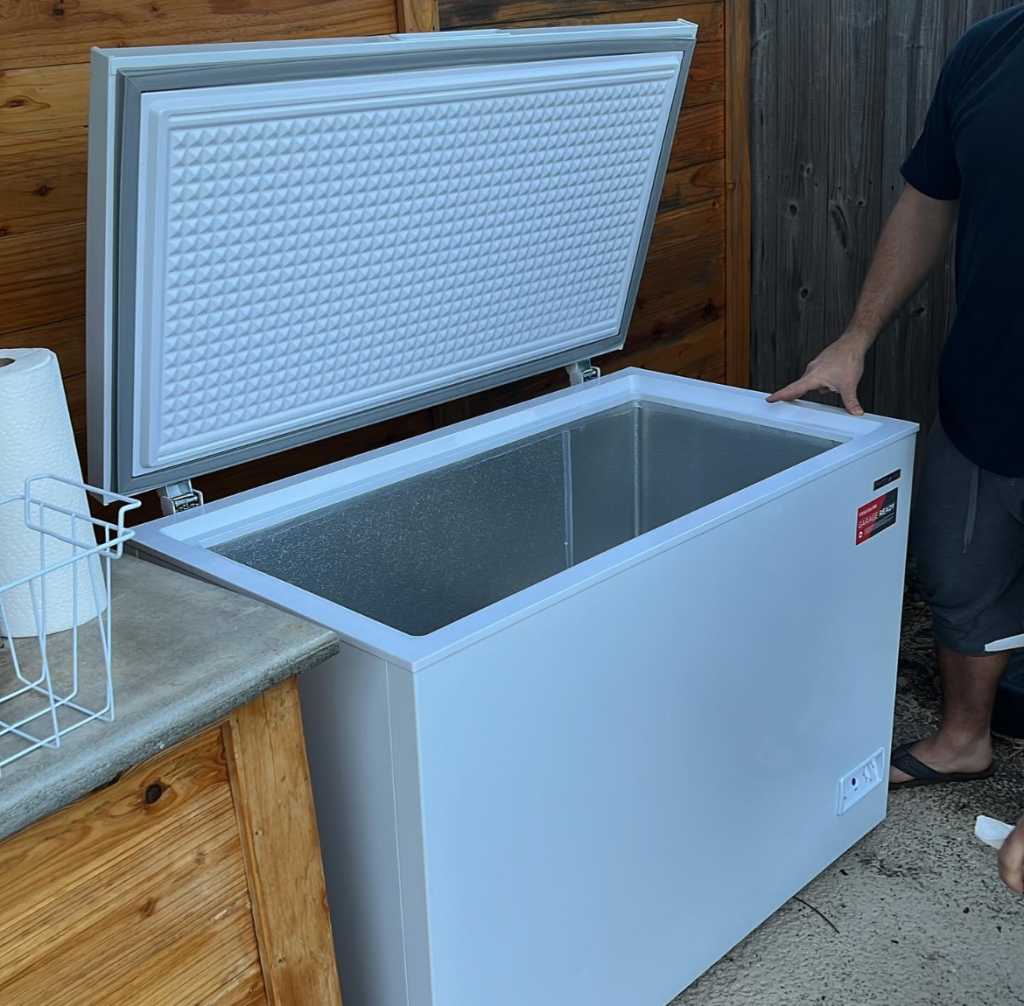
All I Want For Christmas Is A Cold Plunge
I was sold! Sign me up. Show me where to buy mine. But first I had to convince my husband that this was, in fact, worth our while (financially and from a health standpoint). Initially, he told me no. After all, we have a pool so we could use that during the winter months. The problem with the pool … the water circulates continuously because of the pump. So that thermal layer I mentioned before is non-existent, making it much less tolerable. After a few months, I finally convinced him it was a worthy investment. So we waited until Black Friday and found a great deal on a deep freezer. It was delivered a few weeks later, and ready for set up. So without further adieu, here is how you make your very own, DIY cold plunge.
-
You will need a relatively large deep freezer. Ours is a 10.3 cubic feet chest freezer, but if you are a smaller person you may be able to get away with a slightly smaller one.
-
You will need an area for permanent placement. While you can move it, it’s ideal to be able to fill it and not have to move it. However, this place will need to be able to tolerate draining. After all, you do have to clean it periodically. (Ours is adjacent to our outdoor kitchen).
-
You will need Advanced Silicone and a caulking gun. This is to seal all the cracks and crevices on the inside of the freezer. You may also need plumbers tape for the drain.
-
You will need a floating thermometer so you know the temperature. Research suggests that women do not tolerate temperatures lower than 50 degrees, but men can tolerate several degrees colder.
-
You can also purchase a UV filter to leave in the freezer so that you do not have to drain your water as often. This will extend the longevity of the water in the freezer, and keep it clean in between uses. This is not a necessity.
Eventually, we will also add cedar planks around the outside of ours to help it blend with our outdoor kitchen. You can also frame yours in wood if you’d like to make it more aesthetically pleasing, but again this is not necessary.
Ice, Ice Baby
You might be thinking, “Well that’s all fine and well, but why would I need a cold plunge anyway?” And that’s an excellent question! While submerging your body in near freezing water seems counterintuitive, it has actually been proven to have several health benefits. These benefits extend beyond just physical and even include positive changes to mental health and the central nervous system. Some of these health benefits include:
- Decreased systemic inflammation and improved immune system function.
- Improved metabolism through activation of your brown, or visceral fat.
- Reduction of delayed onset muscle soreness or DOMS post exercise.
- Improved dopamine noradrenaline levels for several hours after submersion, which can improve mood and focus.
- Improved cold tolerance, and resilience.
- Decrease in depression, anxiety and overall stress.
Sign Me Up!
Sounds great doesn’t it? While the benefits are amazing, the timing of your cold plunge is important as well and will be dependent on the goals of your plunge.
- If your goal is muscle or strength gain, you should plunge before your workouts.
- If your goal is to reduce muscular soreness or post-exercise inflammation, you should plunge right after exercise.
- If you are in the midst of a competitive event and your goal is improved recovery and performance for the next event (ideally in 1-2 days), plunge right after exercise.
- If your goal is improved immune function, improved mood, or another mental benefit, you can plunge at any time. However, it should be noted that the spike in dopamine and noradrenaline may make it hard for some people to sleep shortly after the cold plunge.
So Is It All It’s Cracked Up To Be?
If you’re wondering how it’s going with my cold plunge … stay tuned for my next post! I’ll be sharing how I’m feeling after a few months of plunging multiple times a week, and the health changes I’ve seen.


