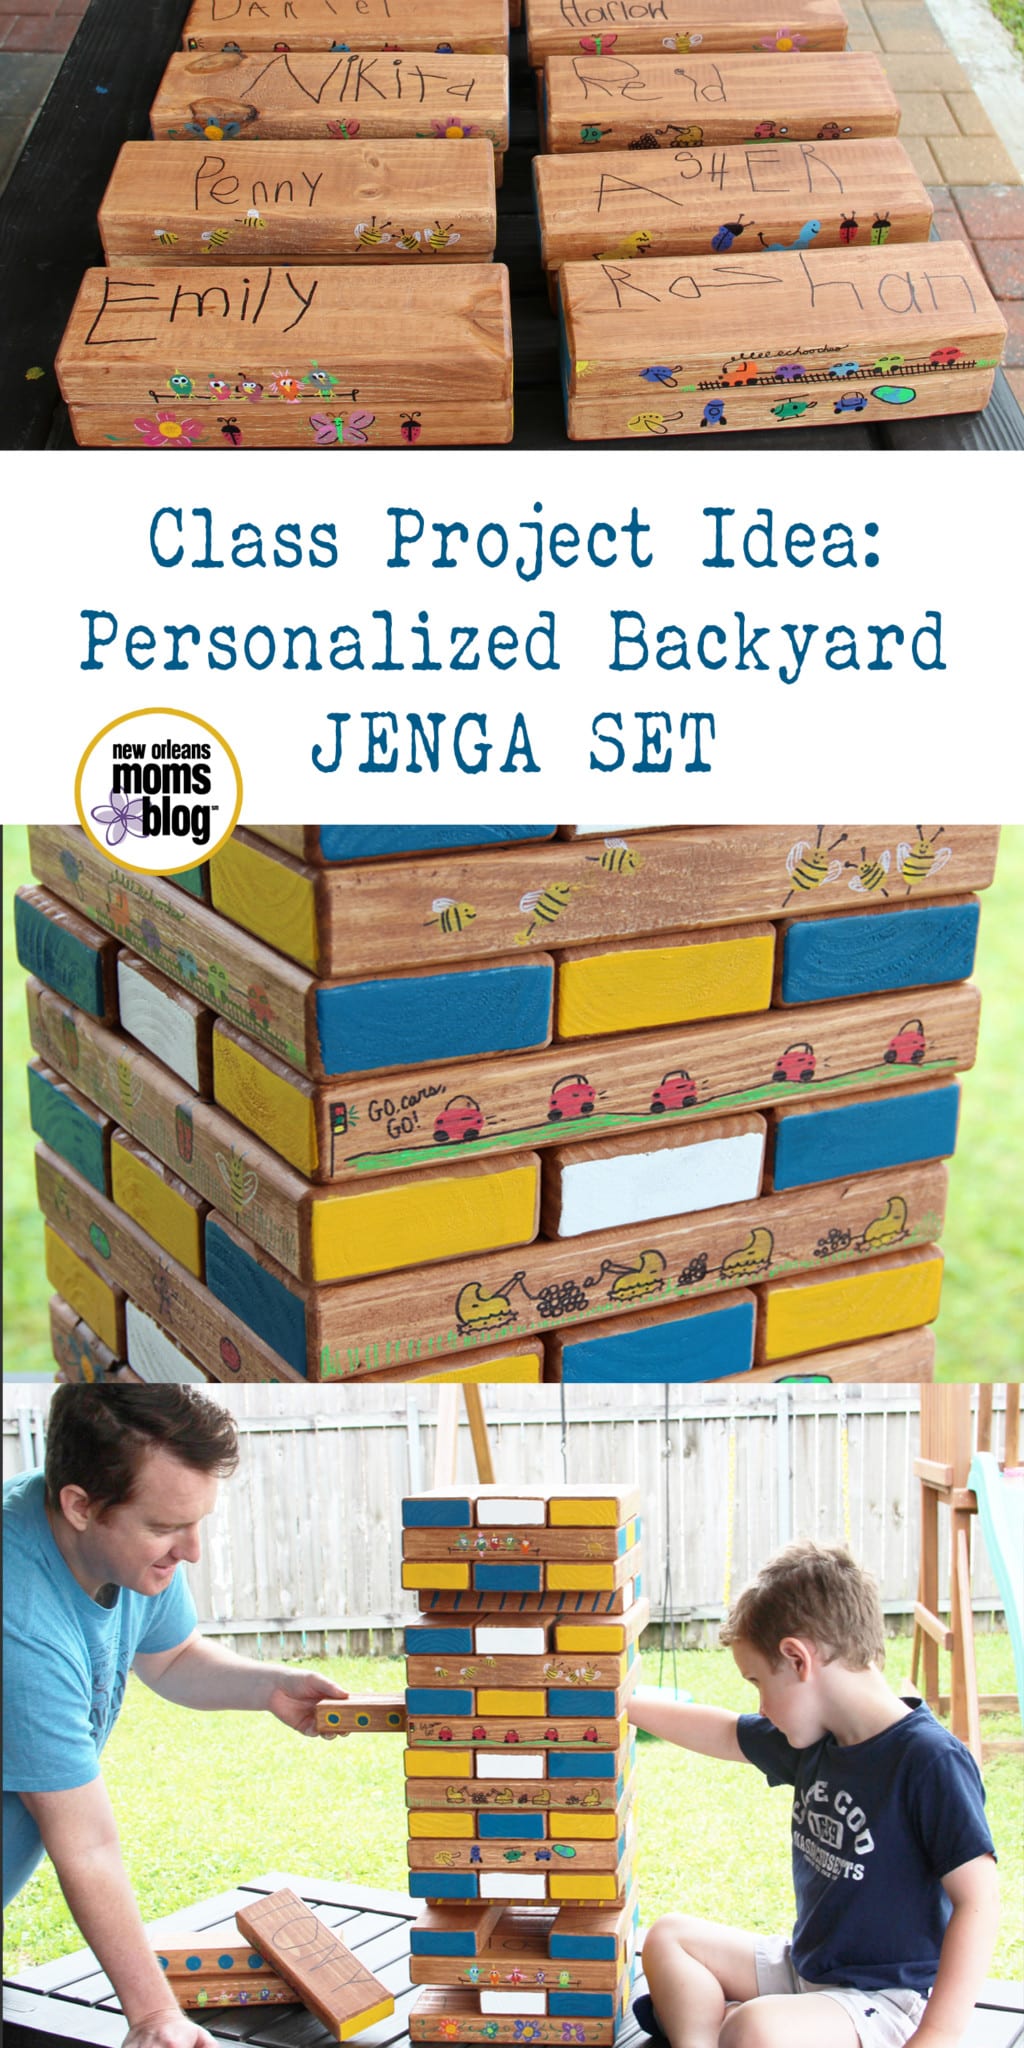
I am one of the Room Parents for my son’s Pre-K class. One of the responsibilities of the Room Parents is to create a class project to be auctioned off at the school’s big fundraising gala. Earlier this year, I met with the other Room Parent for the class and we decided we wanted to something for the backyard. Our first choice for the project was a giant jenga set decorated with the kids’ fingerprints. We crossed our fingers hoping that some other parents in our class would be handy with woodworking and, luckily, two of the class dads agreed to cut and sand ALL of the wooden pieces for us. Whew!
Here’s how the project came together:
Supplies
- (6) 2 x 4’s
- Hand or Circular Saw
- Sandpaper (our dads used a sanding machine)
- Stain
- Paint (We used exterior paint with primer, but outdoor acrylic paint would work just as well.)
- Short-handled paintbrush for staining
- 1″ foam brush for painting the ends
- Pigment stamps or acrylic paint for fingerprints (2 sets of stamps if you are working with another parent)
- Paint markers and sharpies for decorating (1 per color)
- Clear acrylic spray for sealing the blocks (We used 4 cans of Tree House Studio Clear Acrylic Matte Coating.)
- Basket or box to house the Jenga set
- Things to bring with you to when working with the kids: stamps, post-its, pencils, and baby wipes.
Building It
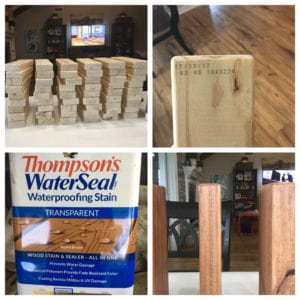 Step 1: Cut each 2×4 into (9) 10.5″ pieces so you have 54 pieces total.
Step 2: Sand each piece. This is important because if the ends aren’t sanded down properly sap can start coming out of them. The dads who sanded ours did a great job rounding out the ends of each piece too so we don’t have any sharp corners.
Step 3: Stain each piece. I used Thompson’s WaterSeal Waterproofing stain in Acorn Brown. If I did it again, I might have used another color stain, but I liked that this product would stain, seal, and waterproof the wood all in one step. With the crazy humidity in New Orleans, waterproofing the wood was a priority! To stain the pieces, I rolled some paper onto my kitchen table. It took about three hours to stain all the pieces well, but I did it when my son was in school and my daughter was at my mom’s house, so I was able to take my time and also clear some TV shows off of my DVR! One thing to note: most commercial wood is stamped, so about a third of the pieces had a stamp on them. I used nail polish remover to take off some of the ink before staining them. Then I did a few extra 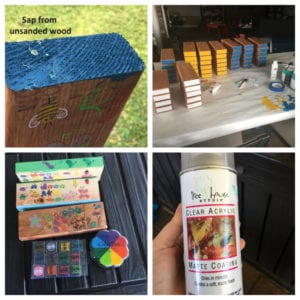 coats of stain on the spots with ink on them and it covered them well.
Decorating It
Step 1: Do a test run. Trust me! Cutting, sanding, and staining the Jenga set is a big time commitment, so you want to go into decorating the set having your design finalized. While the dads were cutting and sanding the class set, I went to Home Depot and bought a single 2×4. The pros at Home Depot cut that one piece into 9 game pieces for me, and I used those to try out different paints and stains. I learned a lot from the test pieces. I learned that the original plan to paint the pieces did not look good. I learned that if the ends are not sanded properly that sap will start to come out of them. I learned that the first set of stamps I purchased were too light to be seen on the stained wood.
Step 2: Paint the ends. This isn’t necessary, but the other Room Parent and I thought it would look nice to have some color on the ends so we decided to paint the ends in vibrant versions of our school’s colors. A 1″ foam brush was ideal for painting the ends with clean lines. It’s easy to paint the ends if you do it while they are stacked.
Step 3: Create a design key. If we were to do this project again with older kids, we would probably just send a couple of blocks home with each student to paint the sides however they wanted to. We were working with 4 and 5 year olds though, so we decided to have a bunch of designs from which they could choose. We found a lot of fun ideas on Pinterest. Before you go to the class, create a couple of blocks with several designs completed so the students can pick their favorite designs. Our students chose from a space theme, vehicles, flowers, butterflies, birds, insects, and dinosaurs.
Step 4: This is the fun part! We went to school and had each student design 2 pieces. They wrote their names on top of the pieces in pencil (I later traced over them with a Sharpie.). Then they chose the fingerprint art for their blocks. It was so cute watching them pick out their favorite designs and decide which colors to use and where to place their fingerprints. No two pieces wound up being the same. We decided to use pigment stamps (by ColorBox and Stampabilities) instead of paint so that the fingerprints would be neater. Make sure to write down what the kids chose on a post-it and put it on the top of the block after they’ve stamped their pieces. Otherwise, you might not remember what each fingerprint was supposed to be when you finish the design!
Step 5: Turn the fingerprints into art. Let the fingerprints dry for a while before drawing over them. Keep in mind that the pigment stamps are not waterproof so you need to make sure they aren’t touching anything before they are sealed or they can be wiped off and smeared. Thin-tipped paint markers and sharpies were used to decorate the fingerprints and add little accents to each piece. We have 20 kids in our class, so 40 pieces were decorated with fingerprints. The extra 14 pieces were decorated with stripes and dots.
Step 6: Seal the pieces with a clear acrylic matte coating. I put about 8 thin coats of the acrylic spray on the sides with the kids’ fingerprints to be extra safe and 2 coats on each of the other sides.
The Final Product
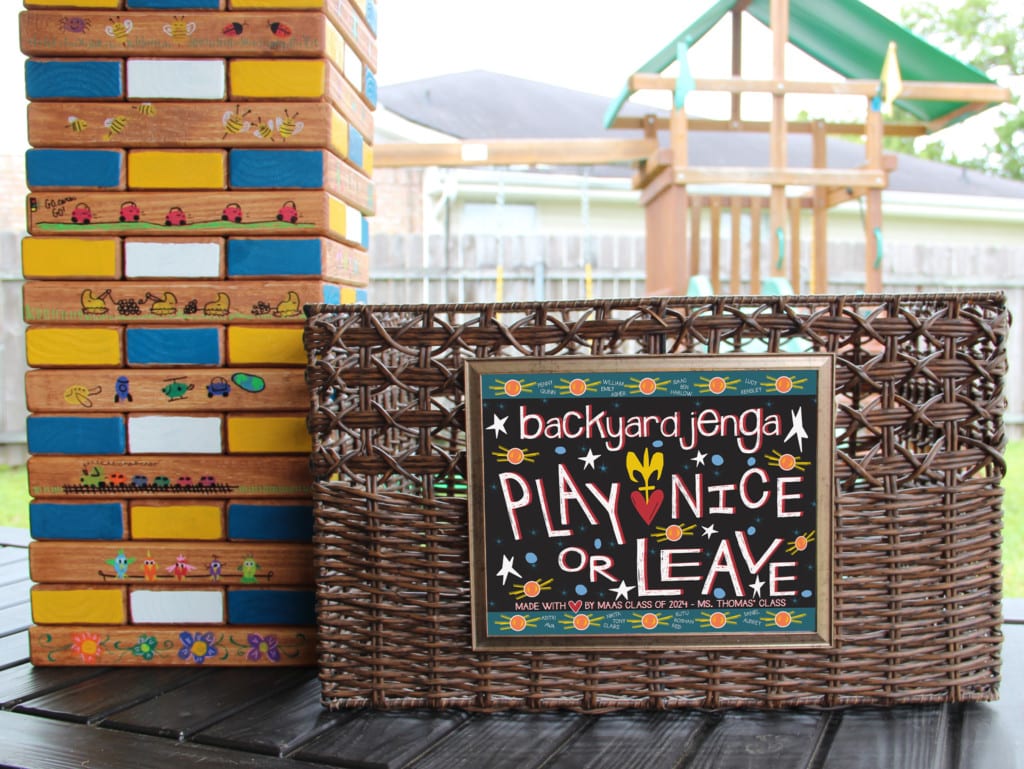
I made a “Play Nice or Leave” sign in homage to local artist Simon, put it in a Dollar Store frame, and affixed it to the front of the basket. The project was complete and ready for bidding! And can you guess who bid the most on it at the gala? (She asks sheepishly…) Me. My son was really excited about the game and, after all the time I put into it, I wanted it for our backyard! The other Room Parent and I decided that we will probably choose a simpler project next year, but that it might be fun to revisit this project in 5th grade the kids would be able to take ownership of their own game pieces. In the meantime, I’m sure my family (and whichever classmates come over to play) will have a lot of fun with this unique Backyard Jenga set.









This is awesome, Marie. I did not know that so much work that the parents and kids put on this project. We are so lucky to have you as the patent captain of our class.