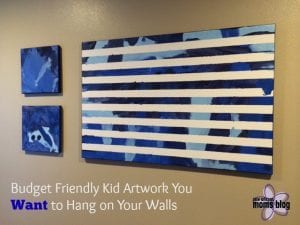
Kid art is such a difficult thing in my opinion. You want to save each and every masterpiece, but you don’t want be drowning in construction paper and finger painting glory. You would need a storage unit to just keep the artwork they complete through kindergarten. So instead, I have decided to go for quality and not quantity. Yes, I just admitted that I don’t save everything that comes home from school or the latest creation she just whipped up in the living room.
I do keep a good selection of artwork nicely tucked away in a box in the closet. After all, my refrigerator can only take so much with out becoming a cluttered mess. I have a solution to creating kid artwork that you actually want to keep and display in your home. This project is budget friendly and can help fill the blank walls in your home as well as be a fun activity that you can do together.
Here is what you need:
- paint and brushes
- a canvas
- painter’s tape
- an eager painter
The canvas size and shape are totally up to you and your space. Michael’s and Hobby Lobby frequently have canvases on sale or buy one get one free. You can also check their websites for printable coupons. The canvases can be pretty cheap making this project even more budget friendly since that is the most expensive part of the entire project.
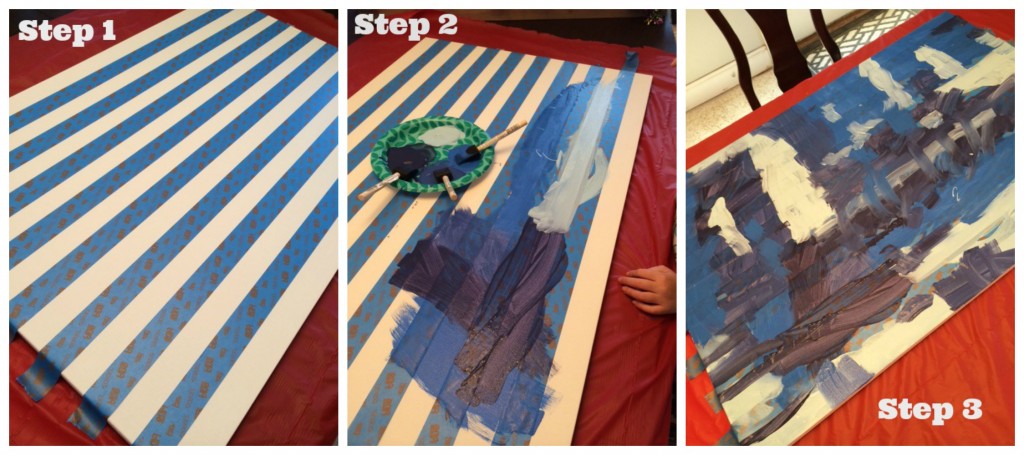
Step 1
First, cover the canvas in a design with painters tape. Choose your design for the tape remembering that this will be the white exposed at the end. Suggestions of what works well are stripes, letters and patterns such as chevron or herringbone. Painter’s tape comes in a variety of widths so you can mix and match then depending on the look you want to achieve. Make sure the tape is stuck firmly to the canvas so that way the paint brush does not pull up the tape when little hands are painting.
Step 2
Then, unleash your child to paint the canvas. Yes, go ahead and paint right over the tape and let them paint in any random design they can dream of. The beauty of this project is that you really can’t go wrong. So if your child can hold a paintbrush, they can do this. There is no worry about staying in the lines.
Note: Don’t forget to paint the sides of the canvas so that it looks finished and complete when you hang it on the wall. If you don’t want to paint it, once it has dried you can hot glue a ribbon around the sides to introduce another pattern or color.
Step 3
Let the painting dry completely before peeling off the painters tape. Once you peel off the tape, then you have your completed masterpiece. The white space that the painter’s tape creates looks like a really cool piece that costs you basically nothing and it was done by your child.
If you want to get really fancy, have your child paint the canvas first and let it dry. Then cover with the painter’s tape leaving gaps in between the pieces of tape. These gaps are where the paint will show through on this version. Overlay the entire canvas with a coat of spray paint. It looks super fancy with a metallic. The possibilities are endless!
We recently renovated our house so my daughter just completed artwork for her bathroom, playroom and helped me to do a metallic piece for the dining room. To create all three took us no more than an hour, so it is great for her attention span in addition to the budget.
Once you have covered the walls in your own home, this makes a great gift for grandparents, family and friends. Or since tomorrow is Valentine’s Day, you still have time to whip up a homemade creation for a loved one.


